
Introdução
Welcome to Butterfly, the open-source note app.
Butterfly is a note-taking app that aims for a unified experience across all platforms. It provides a simple UI with powerful customization.
Primeiros Passos
Seção intitulada “Primeiros Passos”You can use the sidebar to navigate quickly through this wiki.
To start working on the app, you have two options:
- Download the app version that is appropriate for your platform. Butterfly can run on most mobile, desktop, and web platforms.
- Use the web version if you cannot find your platform or if you don’t want to install the app. See here for information about file storage on the web version.
Once you open the app, continue reading.
The Home View
Seção intitulada “The Home View”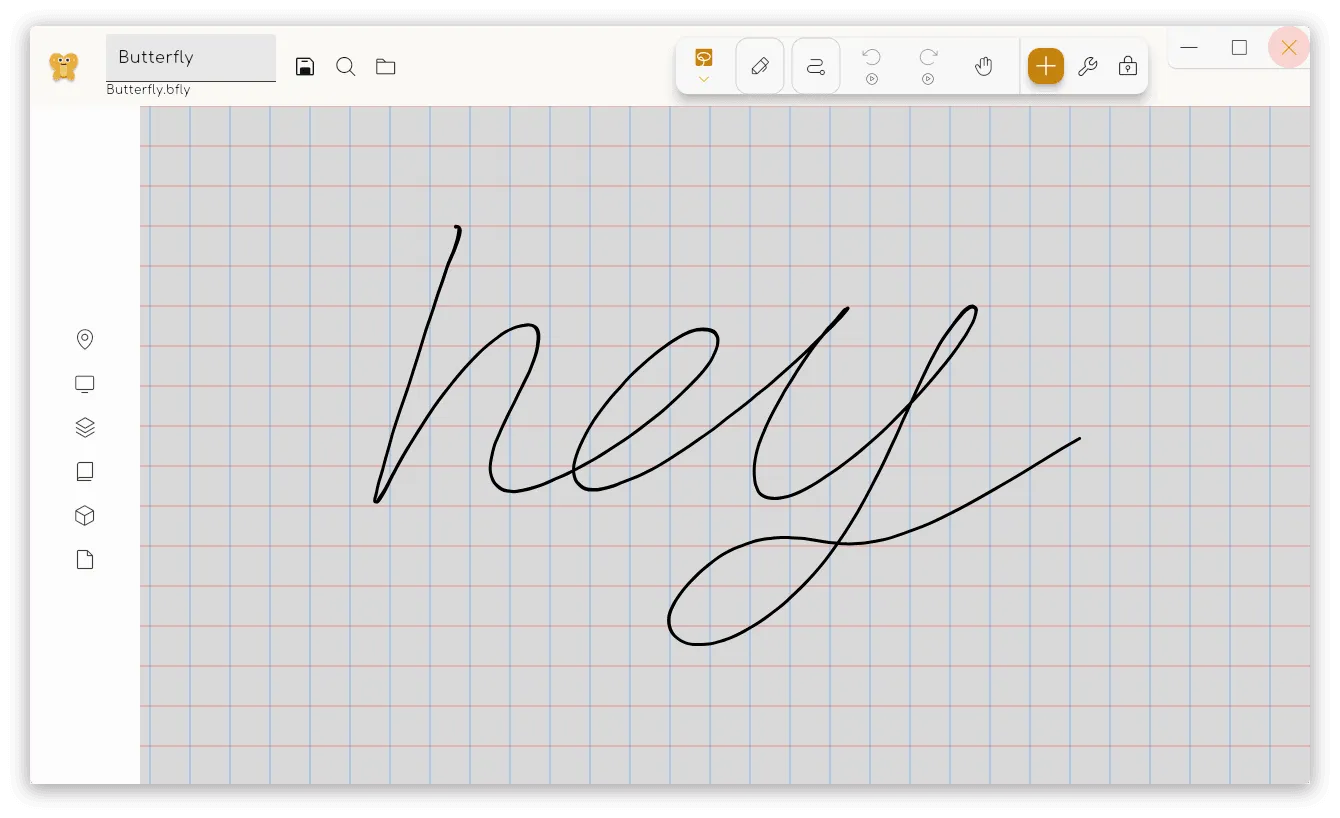 The top of the screen holds the update banner, a link to this documentation, and the Settings button. Finally, to the right of the Settings button, you have a drop-down menu for controlling when the update banner will appear (always/never/on updates).
The Files section is the main area to the left. Here, you can do the following operations:
- Select the display type ( Grid or List)
- Select the source storage of the files
- Sort the display order of the files
- Add a folder, file, template, or import files by clicking the plus sign
- Switch to a different directory by typing in the Location field
- Search for files
Finally, to the right, you have the Quickstart display with the templates available in the current location. For a fresh install, this includes the Light and Dark templates.
When opening Butterfly on a mobile device, you will be presented with a screen like this:
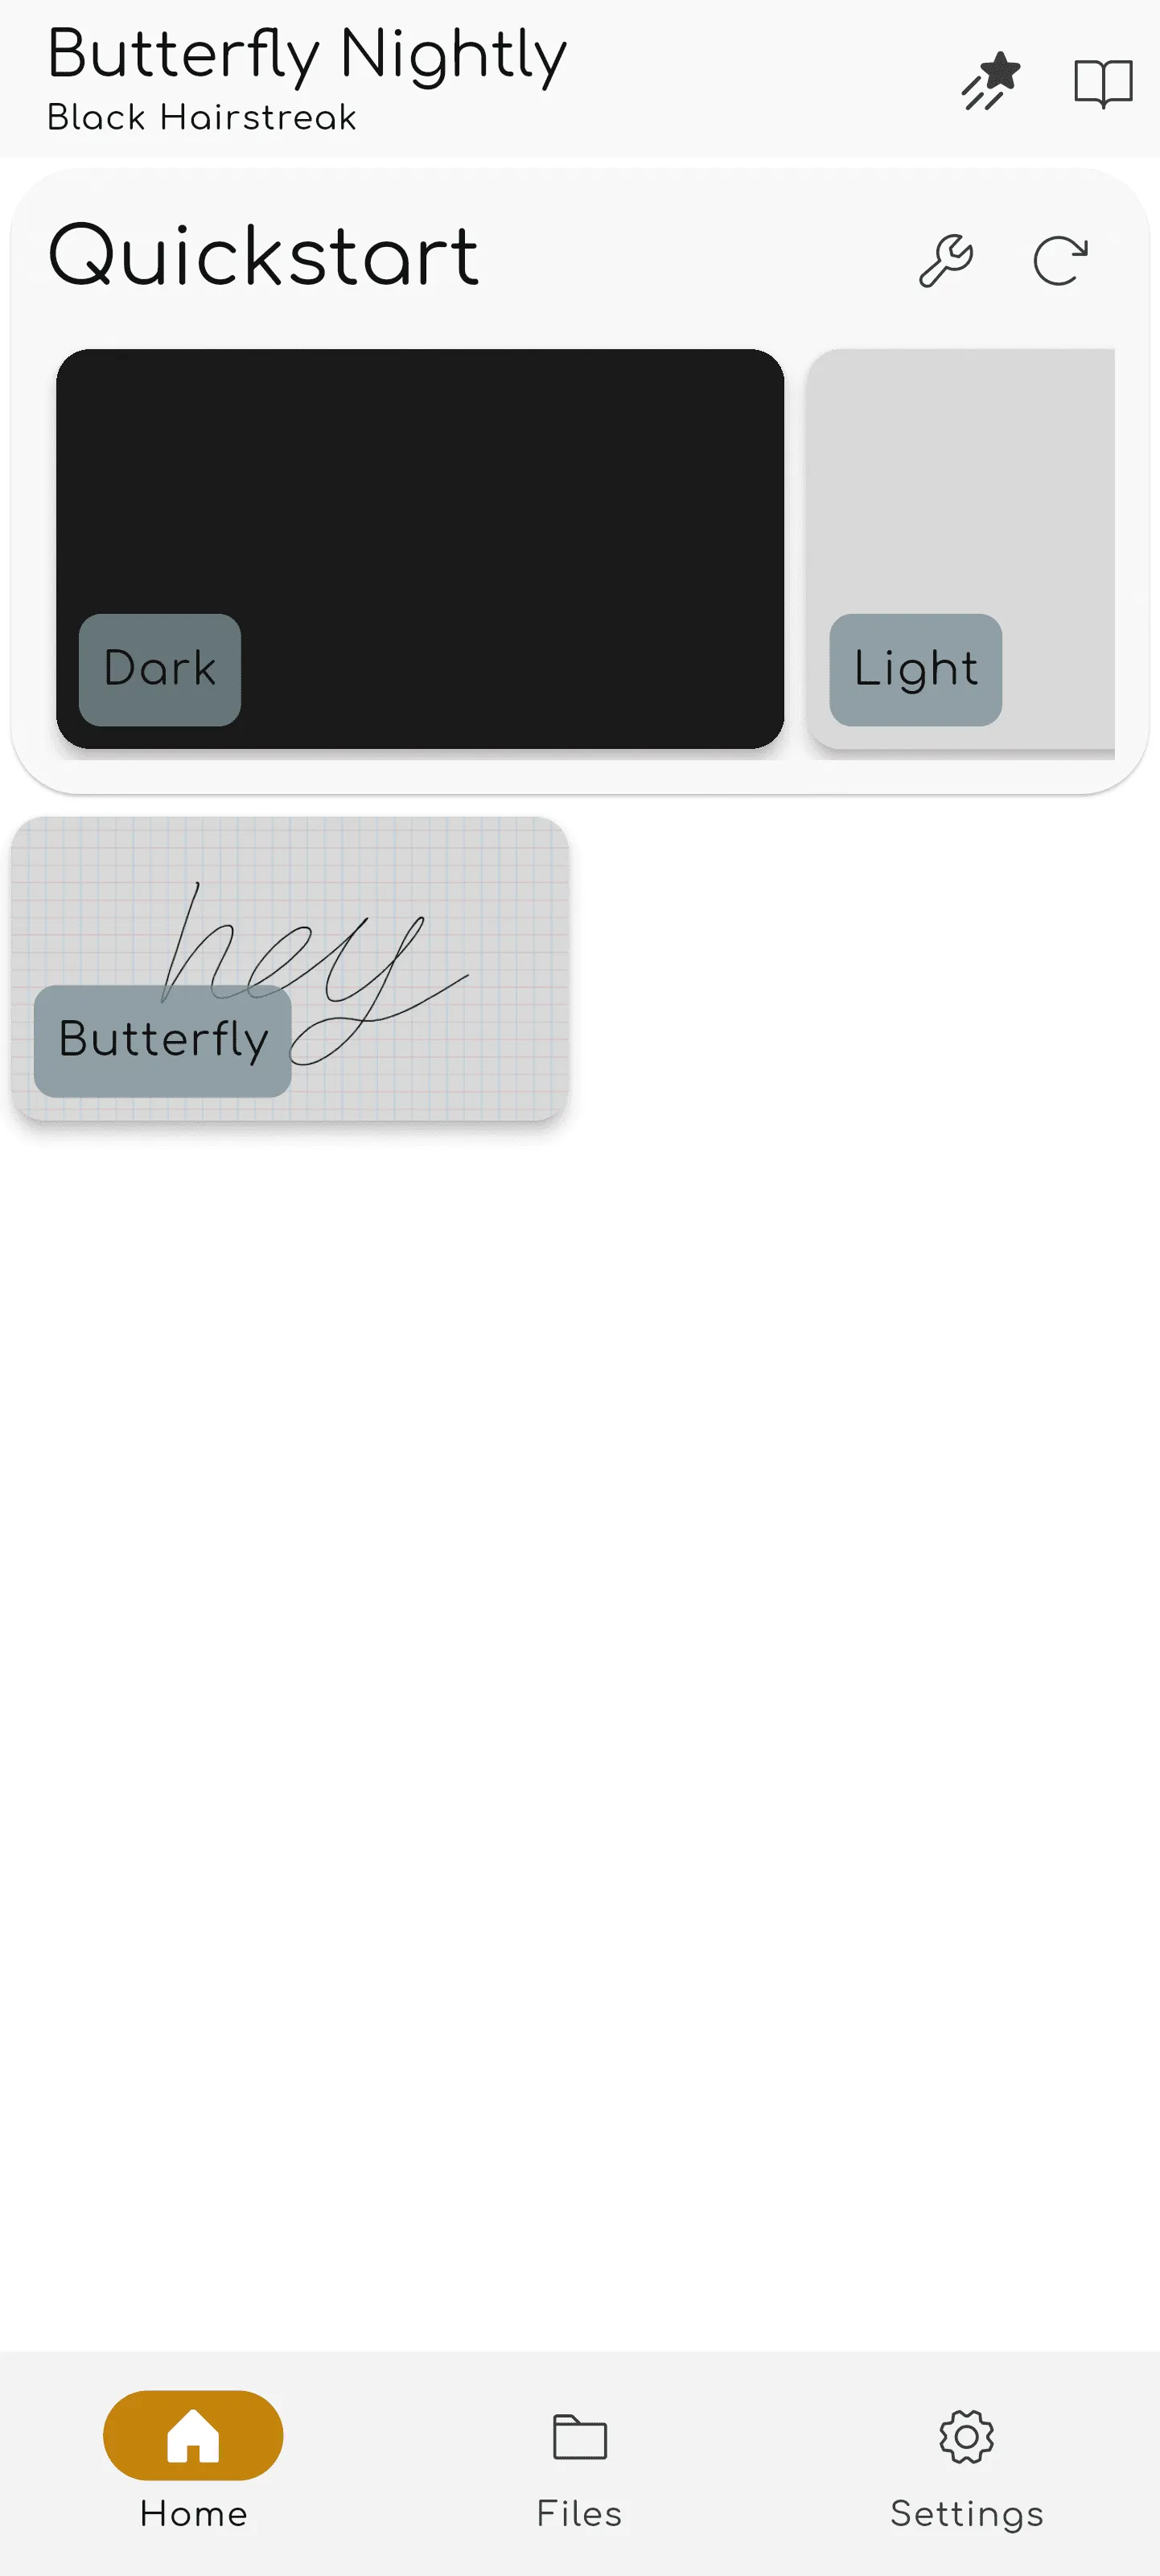 At the top of the screen you will see the release name and a link to the release notes and documentation.
Below those, you can find the Quickstart section with the templates available in the current location. For a fresh install, this includes the Light and Dark templates. Below the templates, you will see your recent files.
Clicking on the files tab at the bottom will bring you to the file list:
 Here, you can do the following operations:
- Select the display type ( Grid or List)
- Reload the file list
- Select the source storage of the files
- Sort the display order of the files
- Add a folder, file, template, or import files by clicking the plus sign
- Switch to a different directory by typing in the Location field
- Search for files
Once you open a document by selecting a template or an existing file, you will get to the Document View.
The Document View
Seção intitulada “The Document View”
You can return from the document view to the document list with the back action of your device. As with the home view, the document display changes based on your device.
In the top-left of the screen, you have the file bar:
![]()
This holds, from left to right:
- The
 Butterfly button, which opens the menu.
 - The Name field, which displays the name of the note. You can rename the note by typing a new name into the field and saving the note.
- The Save button. You can enable auto-saving and optionally disable this button by going to Settings → Behaviors → Autosave.
- The Search button, which allows you to search for elements within the note.
At the top of the screen, you have the file bar:
![]()
This holds, from left to right:
- The Butterfly button, which opens the menu.
- The Name field, which displays the name of the note. You can rename the note by typing a new name into the field and saving the note.
- The Save button. You can enable auto-saving and optionally disable this button by going to Settings → Behaviors → Autosave.
- The Search button, which allows you to search for elements within the note.
The Toolbar
Seção intitulada “The Toolbar”In the top-right of the screen, you have the toolbar:

By default, this bar has:
- The Lasso Select tool
- The Pen tool
- The Path Erase tool
- The Undo and Redo buttons
- The Hand tool.
Then you have the button to add elements to the tool bar, the button to configure the document, and finally the tool to lock the zoom and/or the position of the screen. If some of the elements on the toolbar are not visible to you, click and drag (or swipe) left or right to reveal further tools.
At the bottom of the screen, you have the toolbar:
By default, this bar has:
- The Lasso Select tool
- The Pen tool
- The Path Erase tool
- The Undo and Redo buttons
- The Hand tool.
Then you have the button to add elements to the tool bar, the button to configure the document, and finally the tool to lock the zoom and/or the position of the screen. If some of the elements on the toolbar are not visible to you, swipe left or right to reveal further tools.
Customizing the Toolbar
Seção intitulada “Customizing the Toolbar”To add more tools to the toolbar, click the Add button. In the Add menu, you can use the search bar or filters to find the tool you are looking for. For more information, see Add.
To reorder the tools on your toolbar, first select a tool and then click-and-drag it to a new position. Some input methods have shortcuts to quickly switch to tools based on their position on the toolbar, which can be configured.
Many tools have a configuration menu, which allows you to change settings about how the tool behaves. To open this menu, first select a tool in the toolbar and then click it again.
To add more tools to the toolbar, tap the Add button. In the Add menu, you can use the search bar or filters to find the tool you are looking for. For more information, see Add.
To reorder the tools on your toolbar, first select a tool and then long-tap and drag it to a new position. Some input methods have shortcuts to quickly switch to tools based on their position on the toolbar, which can be configured.
Many tools have a configuration menu, which allows you to change settings about how the tool behaves. To open this menu, first select a tool in the toolbar and then tap it again.