
Einführung

Willkommen bei Butterfly, der Opensource Notiz-App.
Butterfly ist eine Notizen-App, die auf eine einheitliche Erfahrung auf allen Plattformen abzielt. Es bietet eine einfache Benutzeroberfläche mit leistungsstarken Anpassungen.
Erste Schritte
Abschnitt betitelt „Erste Schritte“Sie können die Seitenleiste benutzen, um schnell durch dieses Wiki zu navigieren.
Um mit der Arbeit an der App zu beginnen, haben Sie zwei Optionen:
- Download die App-Version, die für Ihre Plattform geeignet ist. Butterfly kann auf den meisten Mobil-, Desktop- und Web-Plattformen laufen.
- Verwenden Sie die Web-Version, wenn Sie Ihre Plattform nicht finden oder die App nicht installieren möchten. Siehe hier für Informationen zur Dateispeicherung in der Web-Version.
Sobald Sie die App geöffnet haben, lesen Sie weiter.
Die Home-Ansicht
Abschnitt betitelt „Die Home-Ansicht“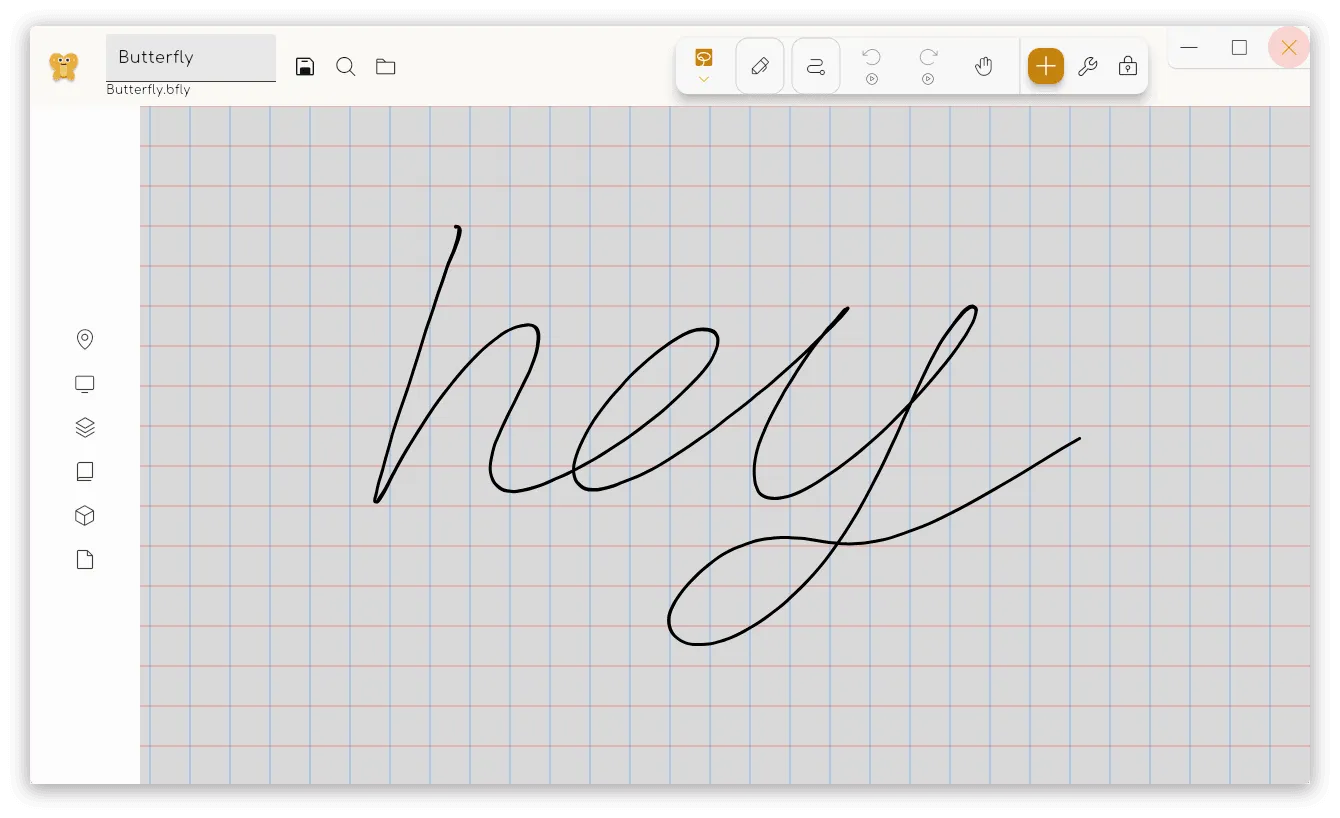 Oben auf dem Bildschirm befinden sich das Update-Banner, ein Link zu dieser Dokumentation und die Schaltfläche Einstellungen. Zum Schluss auf der rechten Seite der Einstellungen-Schaltfläche haben Sie ein Dropdown-Menü um zu kontrollieren, wann der Update-Banner angezeigt wird (immer/nie/bei Updates).
Der Abschnitt Dateien ist der Hauptbereich links. Hier können Sie folgende Operationen durchführen:
- Wählen Sie den Anzeigetyp ( Raster oder Liste)
- Wählen Sie den Quellspeicher der Dateien
- Reihenfolge der Dateien sortieren
- Fügen Sie einen Ordner, eine Datei oder eine Vorlage hinzu oder importieren Sie Dateien, indem Sie auf das Plus-Zeichen klicken
- Wechseln Sie zu einem anderen Verzeichnis, indem Sie das Feld ein Ort eingeben
- Suche nach Dateien
Schließlich, auf der rechten Seite, haben Sie die Schnellstart-Anzeige mit den Vorlagen an der aktuellen Stelle. Für eine neue Installation beinhaltet dies die Vorlagen Hell und Dunkel.
Wenn Sie Butterfly auf einem Mobilgerät öffnest, wird Ihnen ein Bildschirm wie dieser angezeigt:
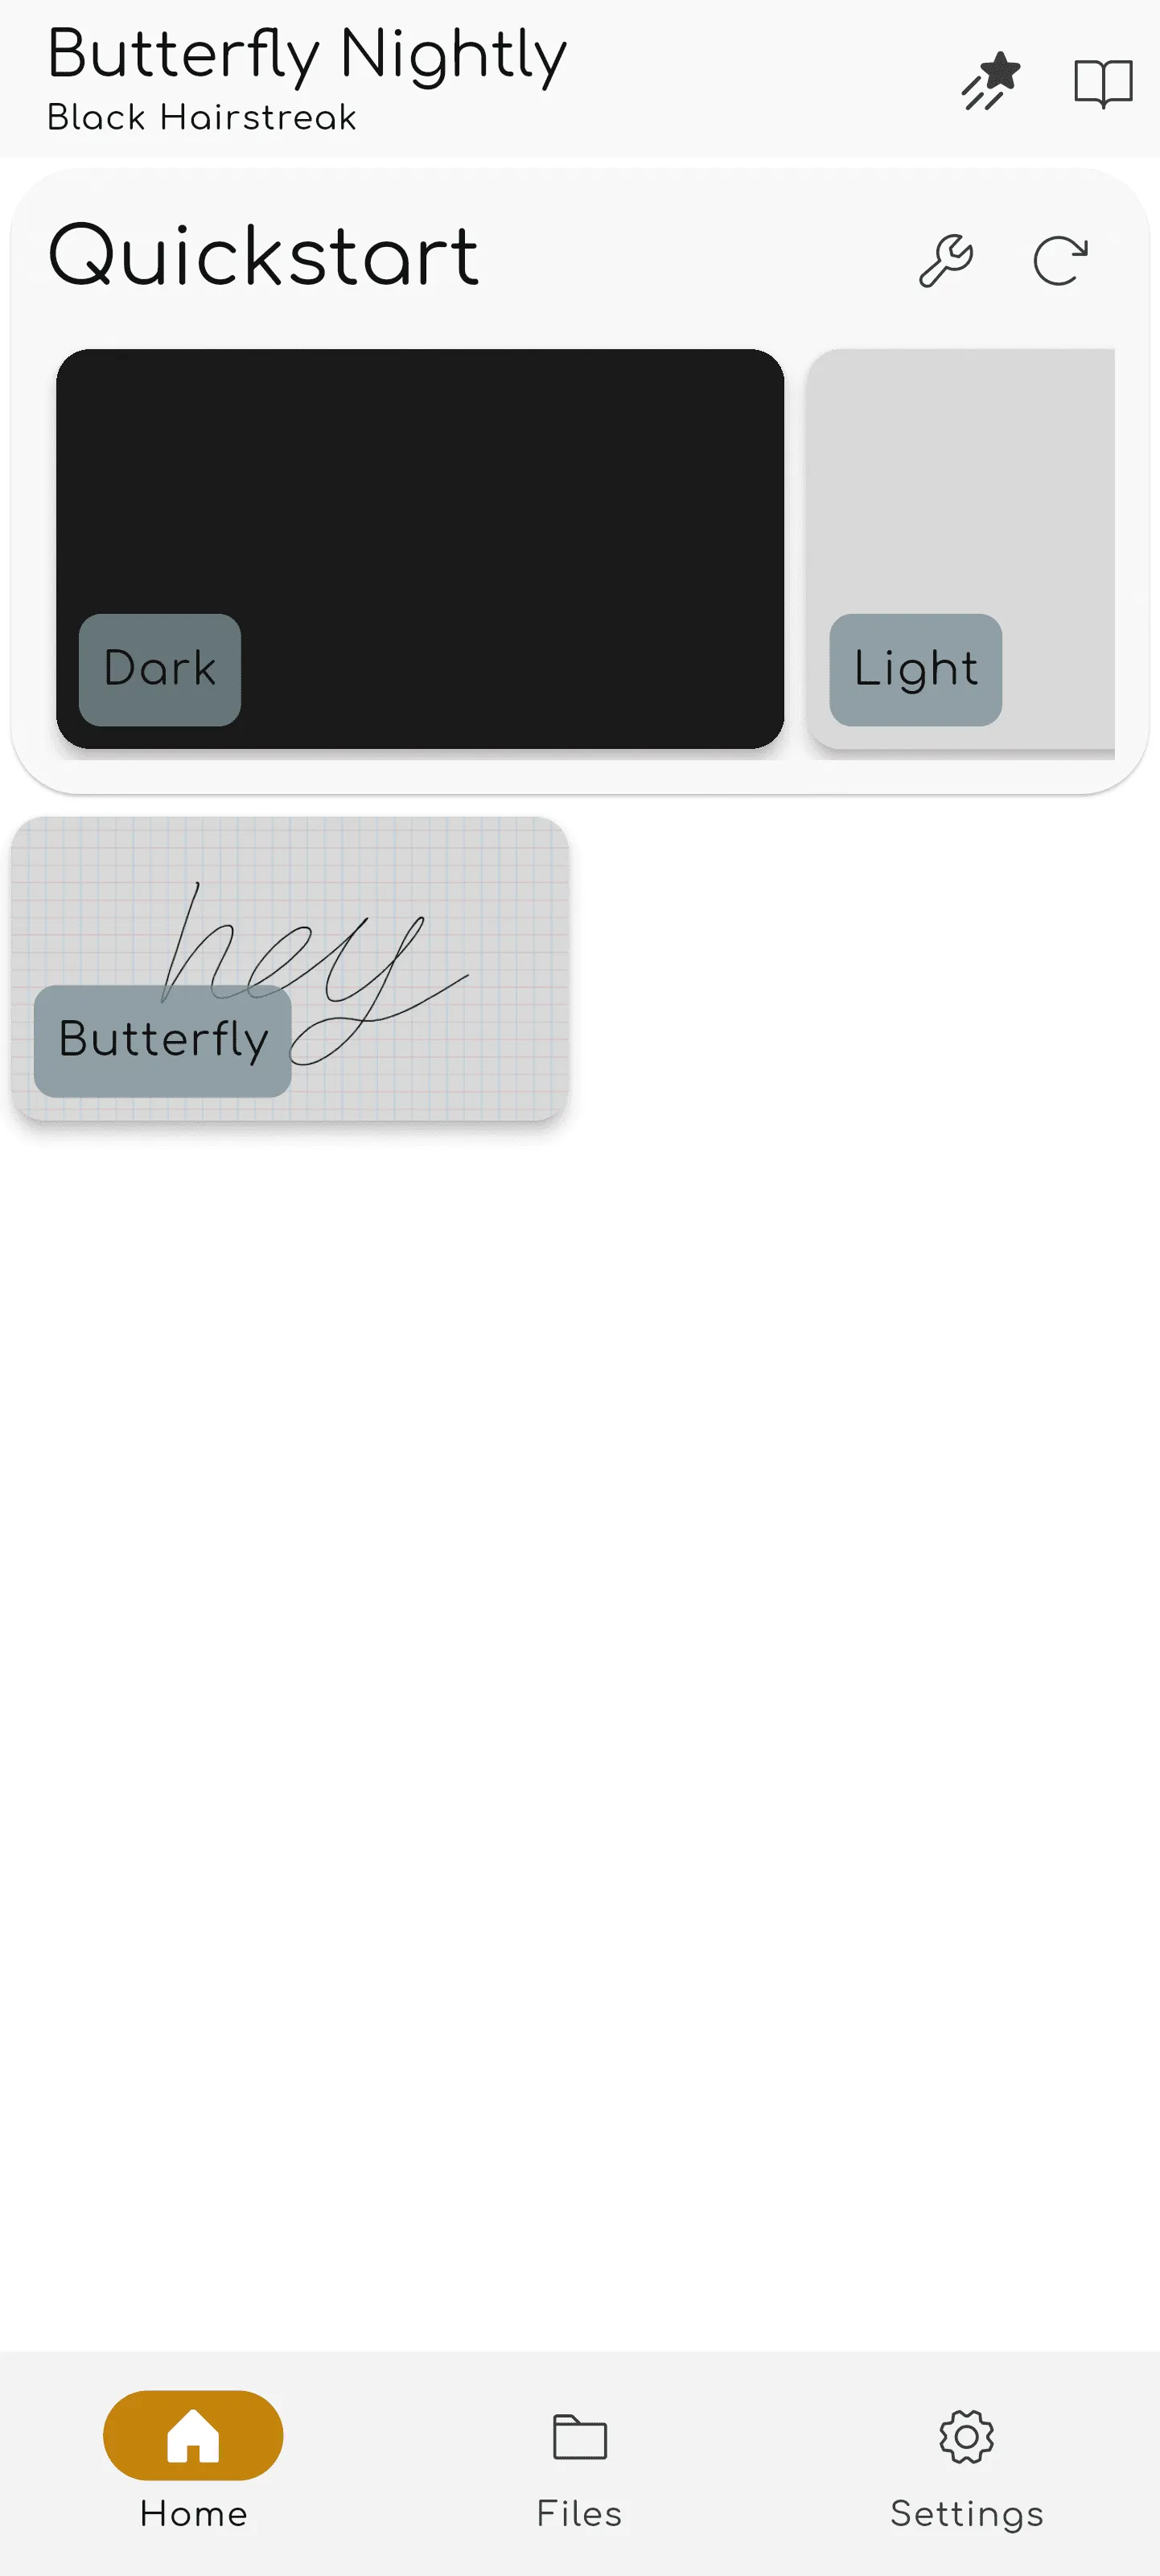 Oben auf dem Bildschirm sehen Sie den Release-Namen sowie einen Link zu den Versionshinweisen und zur Dokumentation.
Unter diesen finden Sie die Schnellstart-Sektion mit den Vorlagen, die an der aktuellen Stellen Sie verfügbar sind. Für eine neue Installation beinhaltet dies die Vorlagen Hell und Dunkel. Unter den Vorlagen sehen Sie Ihre zuletzt verwendeten Dateien.
Wenn Sie unten auf den Dateien-Tab klicken, gelangen Sie zur Dateiliste:
 Hier können Sie folgende Aktionen ausführen:
- Wählen Sie den Anzeigetyp ( Raster oder Liste)
- Dateiliste neu laden
- Wählen Sie den Quellspeicher der Dateien
- Reihenfolge der Dateien sortieren
- Fügen Sie einen Ordner, eine Datei oder eine Vorlage hinzu oder importieren Sie Dateien, indem Sie auf das Plus-Zeichen klicken
- Wechseln Sie zu einem anderen Verzeichnis, indem Sie das Feld ein Ort eingeben
- Suche nach Dateien
Sobald Sie ein Dokument durch Auswahl einer Vorlage oder einer existierenden Datei geöffnet haben, gelangen Sie zur Dokumentenansicht.
Die Dokumentenansicht
Abschnitt betitelt „Die Dokumentenansicht“
Sie können von der Dokumentenansicht mit der Zurück-Taste Ihres Geräts in die Dokumentenliste zurückkehren. Wie bei der Startansicht ändert sich die Dokumentansicht je nach Gerät.
Oben links auf dem Bildschirm befindet sich die Dateileiste:
![]()
Dies enthält von links nach rechts:
- Die
 Butterfly-Schaltfläche, die das Menü öffnet.
 - Das Namensfeld, das den Namen der Notiz anzeigt. Sie können die Notiz umbenennen, indem Sie einen neuen Namen in das Feld eingeben und die Notiz speichern.
- Die Schaltfläche Speichern. Sie können automatisches Speichern aktivieren und diese Schaltfläche optional deaktivieren, indem Sie zu Einstellungen → Verhalten → Automatisches Speichern gehst.
- Die Schaltfläche Suchen, mit der Sie nach Elementen innerhalb der Notiz suchen können.
Oben auf dem Bildschirm befindet sich die Dateileiste:
![]()
Dies enthält von links nach rechts:
- Die Butterfly-Schaltfläche, die das Menü öffnet.
- Das Namensfeld, das den Namen der Notiz anzeigt. Sie können die Notiz umbenennen, indem Sie einen neuen Namen in das Feld eingeben und die Notiz speichern.
- Die Schaltfläche Speichern. Sie können automatisches Speichern aktivieren und diese Schaltfläche optional deaktivieren, indem Sie zu Einstellungen → Verhalten → Automatisches Speichern gehst.
- Die Schaltfläche Suchen, mit der Sie nach Elementen innerhalb der Notiz suchen können.
Die Werkzeugleiste
Abschnitt betitelt „Die Werkzeugleiste“Oben rechts auf dem Bildschirm befindet sich die Symbolleiste:

Standardmäßig enthält diese Leiste:
- Das Lasso-Auswahlwerkzeug
- Das Stiftwerkzeug
- Das Pfadradierer-Werkzeug
- Die Schaltflächen Rückgängig und Wiederholen
- Das Handwerkzeug.
Danach gibt es die Schaltfläche zum Hinzufügen von Elementen zur Symbolleiste, die Schaltfläche zum Konfigurieren des Dokuments und schließlich das Werkzeug zum Sperren des Zooms und/oder der Bildschirmposition. Wenn einige Elemente der Symbolleiste nicht sichtbar sind, klicken und ziehen Sie oder wischen Sie nach links oder rechts, um weitere Werkzeuge anzuzeigen.
Unten auf dem Bildschirm befindet sich die Symbolleiste:
Standardmäßig enthält diese Leiste:
- Das Lasso-Auswahlwerkzeug
- Das Stiftwerkzeug
- Das Pfadradierer-Werkzeug
- Die Schaltflächen Rückgängig und Wiederholen
- Das Handwerkzeug.
Danach gibt es die Schaltfläche zum Hinzufügen von Elementen zur Symbolleiste, die Schaltfläche zum Konfigurieren des Dokuments und schließlich das Werkzeug zum Sperren des Zooms und/oder der Bildschirmposition. Wenn einige Elemente der Symbolleiste nicht sichtbar sind, wische nach links oder rechts, um weitere Werkzeuge anzuzeigen.
Symbolleiste anpassen
Abschnitt betitelt „Symbolleiste anpassen“Um weitere Werkzeuge zur Symbolleiste hinzuzufügen, klicken Sie auf die Schaltfläche Hinzufügen. Im Menü „Hinzufügen“ können Sie die Suchleiste oder Filter verwenden, um das gewünschte Werkzeug zu finden. Weitere Informationen, see Hinzufügen.
Um die Werkzeuge in Ihrer Symbolleiste neu anzuordnen, wählen Sie zuerst ein Werkzeug aus und ziehen Sie es dann an eine neue Position. Einige Eingabemethoden haben Tastenkürzel, um anhand der Position in der Symbolleiste schnell zu Werkzeugen zu wechseln; dies kann konfiguriert werden.
Viele Werkzeuge haben ein Konfigurationsmenü, in dem Sie Einstellungen zum Verhalten des Werkzeugs ändern können. Um dieses Menü zu öffnen, wählen Sie zuerst ein Werkzeug in der Symbolleiste aus und klicken Sie es dann erneut an.
Um weitere Werkzeuge zur Symbolleiste hinzuzufügen, tippen Sie auf die Schaltfläche Hinzufügen. Im Menü „Hinzufügen“ können Sie die Suchleiste oder Filter verwenden, um das gewünschte Werkzeug zu finden. Weitere Informationen, see Hinzufügen.
Um die Werkzeuge in Ihrer Symbolleiste neu anzuordnen, wählen Sie zuerst ein Werkzeug aus und halten Sie es dann gedrückt, um es an eine neue Position zu ziehen. Einige Eingabemethoden haben Tastenkürzel, um anhand der Position in der Symbolleiste schnell zu Werkzeugen zu wechseln; dies kann konfiguriert werden.
Viele Werkzeuge haben ein Konfigurationsmenü, in dem Sie Einstellungen zum Verhalten des Werkzeugs ändern können. Um dieses Menü zu öffnen, wählen Sie zuerst ein Werkzeug in der Symbolleiste aus und tippen Sie es dann erneut an.